
Do you love interesting swimwear details like my sister does? She likes tankinis – the two piece construction means no hassle to pull down for the bathroom or to remove when she gets dressed again. But she doesn’t love clips in the back. They are hard for her to reach around and fasten. So she looks for tankinis that have no clips. She also likes interesting, designer swimwear details, especially ones that allow good arm movement. That’s not an easy task. Here are some interesting swimsuit details you can add on your next make, inspired by my sister’s tankini purchase.
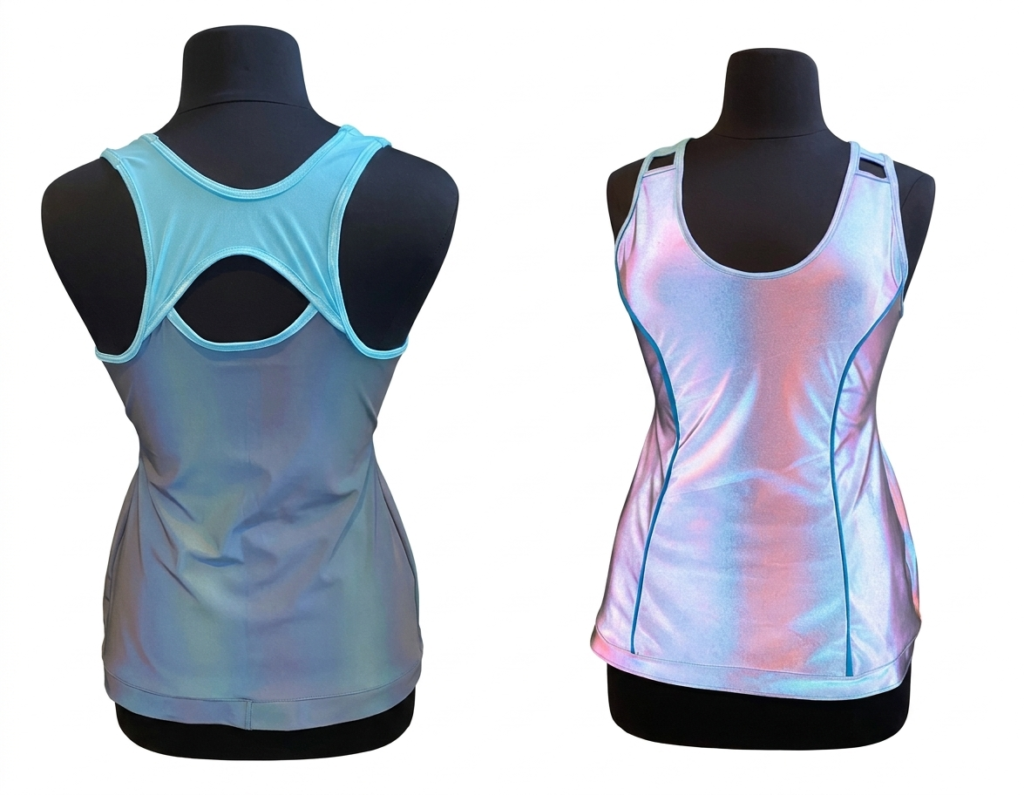
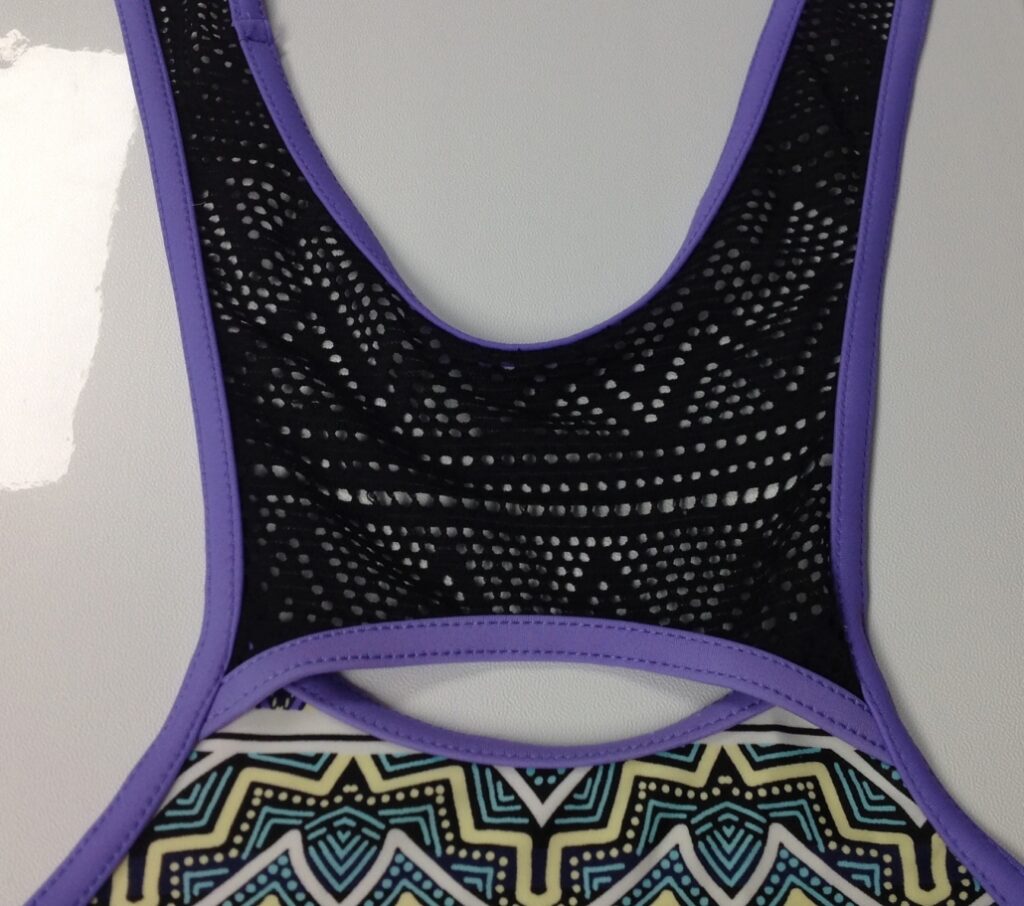
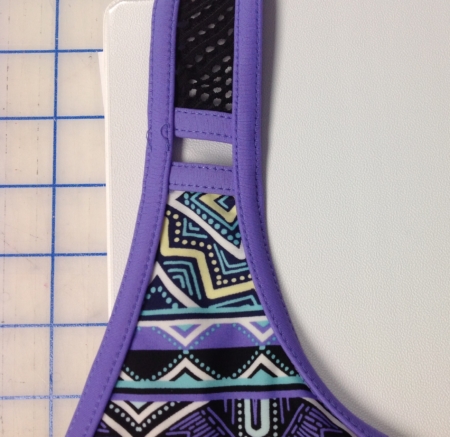
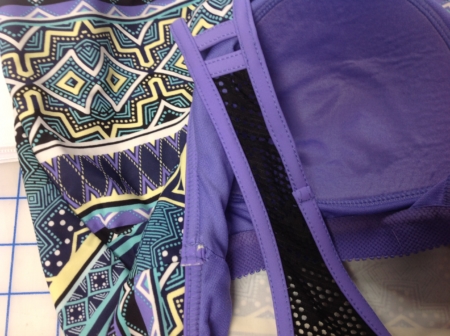
I used the Princess Tankini pattern and modified it a little on the back and front. Nothing too major and nothing you cannot handle! You can see the open area on the back with some open geometric fabric above it (interesting!)
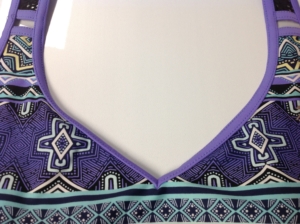
This suit has some clever swimwear details like a two piece back and no clip! Just pull it on and you are good to go. I also love the interesting swimwear details in the front strap. The back strap continues over the shoulder and ends with another open area on the front, so there are no shoulder seams.
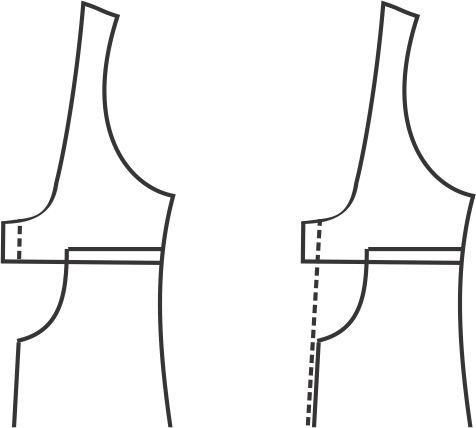
To draft this from the Princess Tankini pattern you need to change the two piece back into one piece. First, remove the allowance for the turn under for the clip (1″ or 2.5 cm) on the top back piece. Next, join the top and bottom pieces of the back along the seam between them, overlapping them as if they were sewn. That means overlapping by two times the seam allowance of 1/4″ (6 mm) so 1/2″ overlap total (12 mm). Extend from this new top edge (dotted line) to the bottom hem, in 1/4″. You won’t need a centre back seam – your back is now one piece and will be cut on the fold of the fabric. Yes, that changes the DoGS a little but that will not matter in this case..
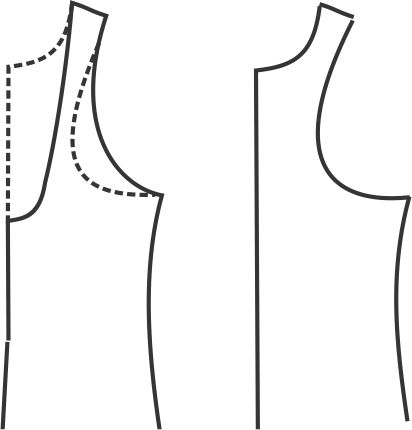
Raise the centre back area up from its current location to a point much higher on the back, almost to the shoulders. I raised mine 7′ (17.5 cm) from the original. That allows enough room to draft the open back. You can scoop our the armhole area too to make it more of a racer style back, if you want.
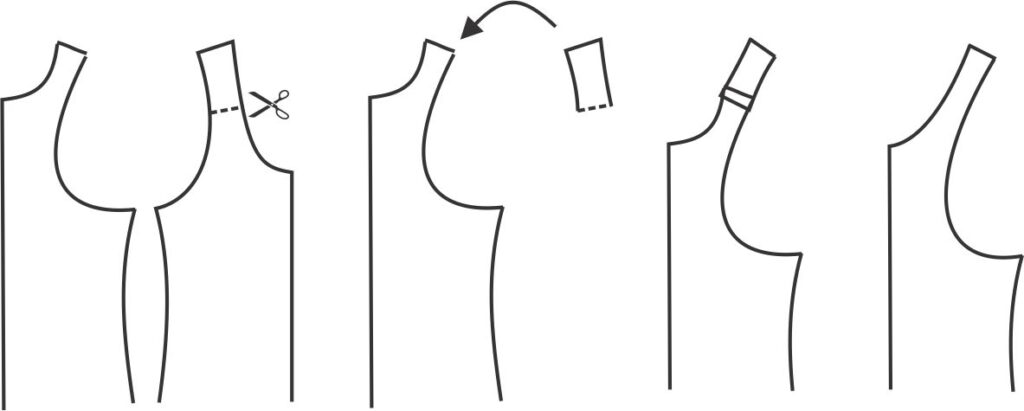
Let’s look at the front now because we have to allow for that in this part of the draft as well. Decide where on the front you want the break to be. It could be anywhere along the front strap. Cut along this line keeping the line at right angles to the edges of the strap. Move this short section of front strap to the back and attach it to the back piece, once again overlapping by 1/2″ 912 mm) to compensate for the seam allowances. Smooth out the curves on the strap if you need to.
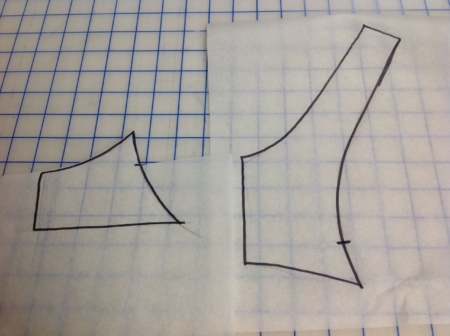
One last thing before the drafting of the actual open back shape. If you are going to use any type of binding for the edges, you need to remove the elastic allowance from the edges. That includes the armhole and neckline edges. If you are happy to use elastic and turn over the edges as you normally do, then there is no need to remove the 3/8″ (1 cm) allowance I put in the original pattern. Now you can draw the peek-a boo shape on the modified back piece. Make each of those lines curved so the open area really shows off. Allow about 1.5″ (3.7 cm) overlap at the sides. Mark each piece where one piece overlaps the other. Here is the pattern I came up with. The strap looks really long – that’s because it also has part of the front strap included.
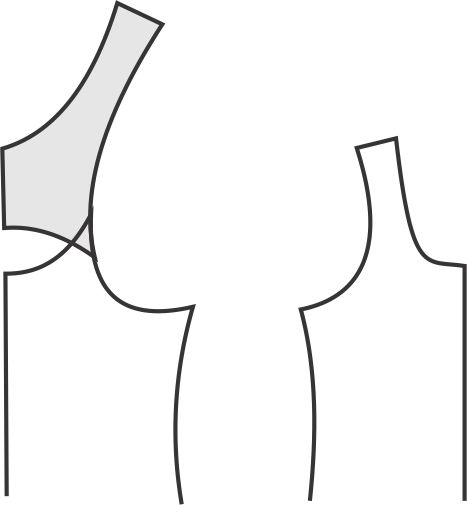
The two back pieces separated look like this. Notice the markings where the two parts overlap each other to create the open space. Also note that the bottom straight edge (on the left piece) will be part of the original back. There is no seam here – it was easier to show you the draft without the rest of the suit pattern piece in the way.
Here is what the modified pieces look like with the top piece in grey. You can cut it out of the same fabric, or a piece of power net or sheer mesh or even stretch mesh for a more see-through look. If you an find a piece of firm stretch open fabric, go for it. Be wary of non-stretch fabric – this piece does need to stretch, but it does not need to be lined. Cut 1 on the fold of each piece. Assemble the internal bra as you normally would, shaping the top edges of the bra lining in the font and lower back piece to the same shape as the main pieces.
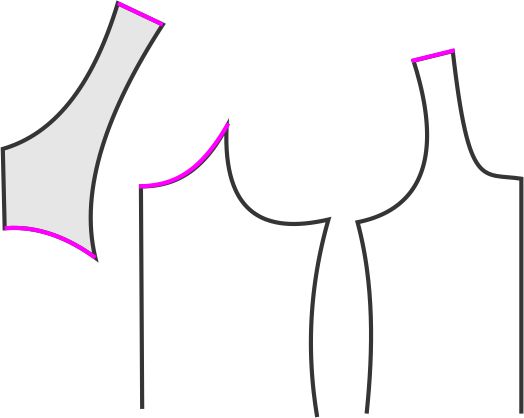
The edges could be finished with cover hem 3/8″ (10 mm) binding strips (used here) or use fold-over elastic binding in a co-ordinating colour. I love the ones that finish out to 3/8″ wide (10 mm). If you aren’t familiar with fold-over, check out this post I wrote. The first edges to finish are the ones indicated below with the pink lines. These edges do not need any other elastic as they are not areas that require any further elasticating.
Once those pink edges have had the finishing binding applied, overlap the top back piece over the bottom back and stitch them together to hold them temporarily. Now you can complete the tankini and finish the edges around the neckline and the armhole. The binding should have a narrow strip of Filpar elastic tucked inside as you are zig-zagging it on the suit. If you find the Filpar a touch too wide for the fold-over, you can skinny it down by cutting some of the width off (don’t worry – it is one piece of siliconized rubber so it will not fray)
If you worry about where to end the binding on the neckline area, here’s as good a spot as any – just down a few inches from the back shoulder area. Don’t try to join it in the open area – it will not co-operate with you!
I do hope you will give these swimwear details a try on your next swimsuit. It is not too late for this summer, and you will be ahead of time for your winter vacation! I must be off – I have more sewing to do!
Here is a photo of the suit that Dana Hill-Sterner made using these instructions. I love the iridescent fabric! Well done, Dana!