One of the things we were always taught while learning to sew was the importance of pressing-as-you-sew. I remember complaining when i first learned to sew in Grade 7 Home Economics that we should have called it “ironing” class instead of “sewing” class, as it seemed we spent more time at the ironing board than we did at the sewing machine. Little did I suspect then…that someday I would fall in love with bra-making, a branch of sewing where there is very little pressing, as a matter of fact. However, those pesky bra cup seams really seem to need a good press at times. Especially on Duoplex and other low-stretch fabrics. We just cannot escape pressing, can we?
The problem is, those bra cup seams, especially on a bra such as London are curved and so to press them on a flat surface just isn’t going to cut it. You need a rounded surface to press them on, in order for them to look their best. But if you have a regular dressmakers ham, you know just by looing at it that is is too large to fit inside the cup to press those bra cup seams. You need something round but smaller than a regular ham. I even tried a wooden block but that had straight edges, so that didn’t work at all for curved bra cup seams.
A solution that I could use was at the hardware store all along. I used a newel post ball cap and attached it to a flat clock of wood. Yes, a newel post ball cap that you would find adorning the top of the post at the bottom of a staircase. That newel post. it urns out that it is perfect for pressing bra cup seams. being made of wood, it bounces the heat back up into the cloth, and being a ball shape, there are no edges for the cloth to fall over and make a crease.
One thing that would make this ball better for pressing bra cup seams, is the addition of a cover for the ball using wool tube socks, or even fastening padding and wool fabric over the knob and tying it underneath. This would help pad the wooden ball and make the whole thing softer and easier to press on. Wool, of course is the best fabric to use, but that doesn’t mean you couldn’t use cotton tube socks instead of wool.
I should mention too, if you are going to make such a knob for yourself, that you should not use a softwood, such as pin to make a ball for the bra cup seams. Pine and cedar have a lot of sap and resin will leak out of them, leaving a sticky mess on your fabrics. You don’t want that! Also do not use pressure treated balls for this. The chemicals they use for preserving wood are going to off-gas some nasty chemicals, such as formaldehyde. Not something you want to breathe in , even if only on a semi-regular basis. So, you want a hardwood, such as birch, maple or oak for your pressing ball. These balls will last a lifetime so make sure you buy the best you can afford.
What size, you say? Well, that depends on your cup size. Most of these balls are 3″ around or less. That isn’t very big. Do not forget, that this ball does not have to fill the cup in order to press the bra cup seams. It just needs to fit inside the cup.
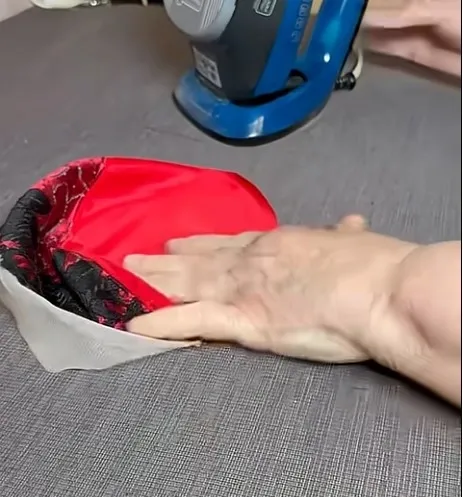
This is my first attempt at video production with a fun tutorial on pressing pesky cup seams. Enjoy! Watch here on YouTube
Don’t forget that I have a wonderfully active Facebook group where we share bra successes and help with fitting challenges.