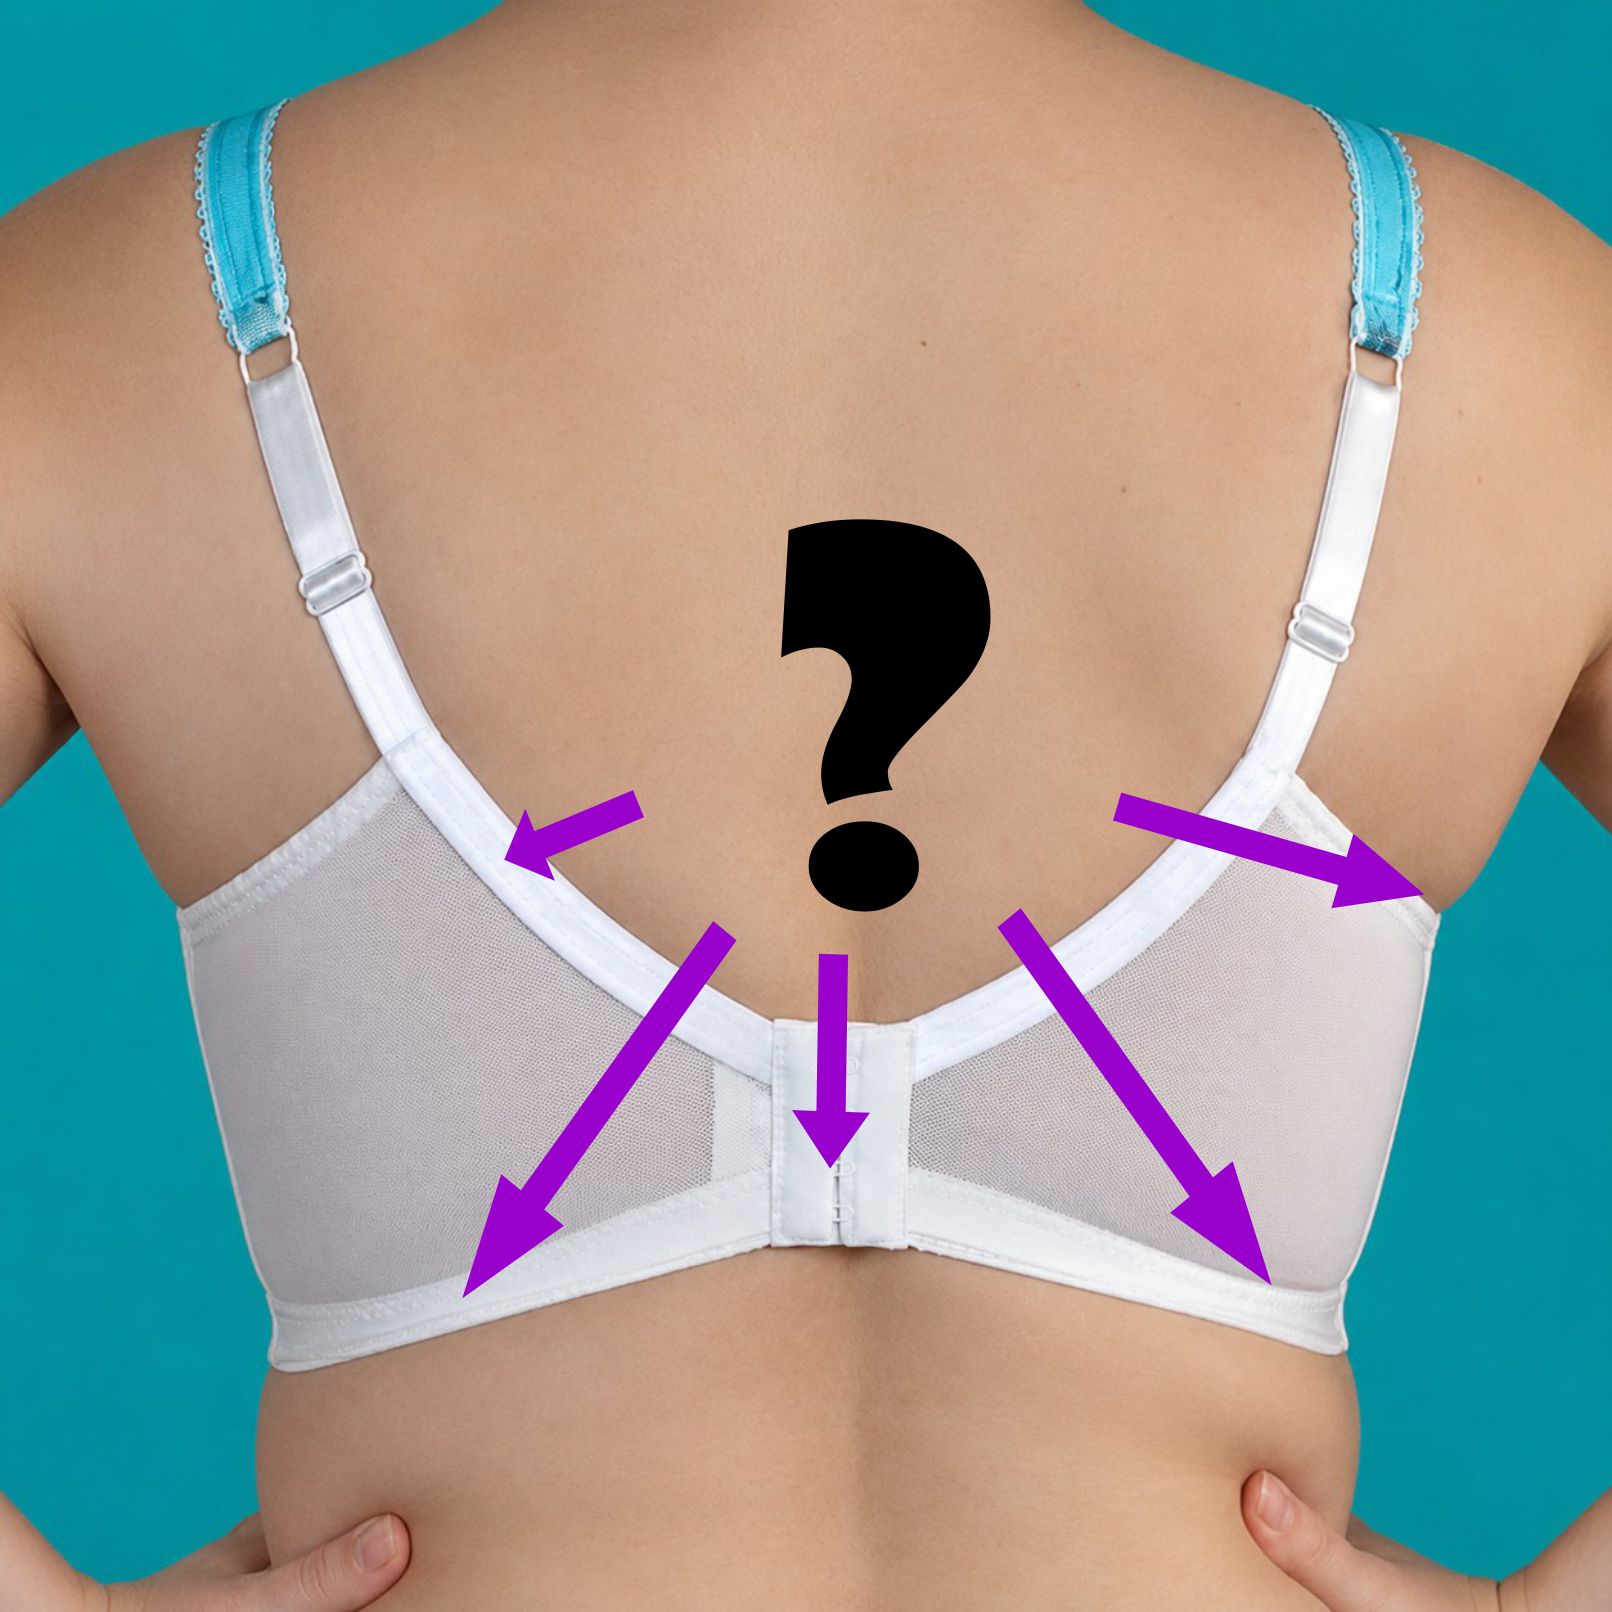

Have you found that you buy a bra only to find that the wire at the underarm pokes you? Or after a short time, the wire slides down your rib cage? Often, there is a flat area of fabric at the base of the breast next to the wire where the breast does not fill the cup. Yet the rest of the cup away from the wire line seems to be filled up. If so, it’s a good assumption that you are an Omega breast shape. Just like the Greek letter Omega, the base of the breast at the chest wall is smaller in width than the rest of the breast.

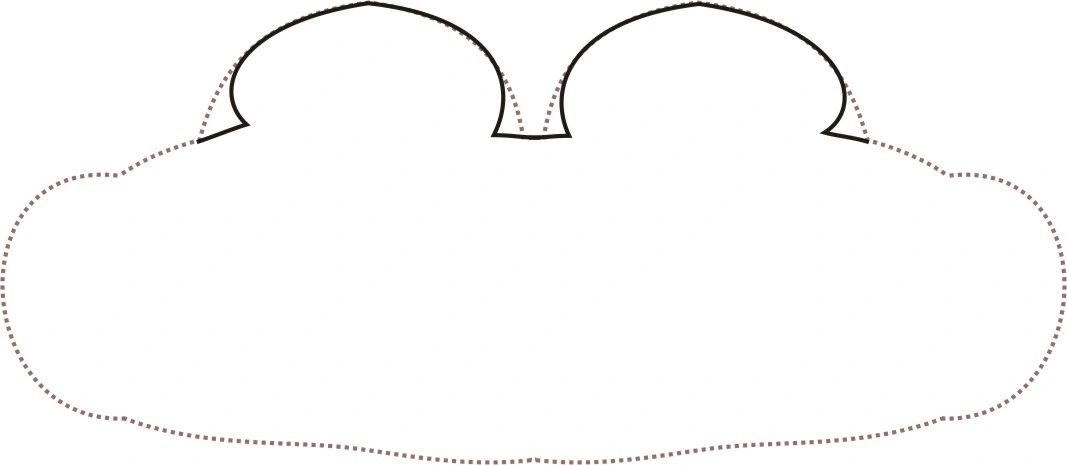
The Omega shape is a term I coined when I wrote the Bra-makers Manual Volume 2. Sure enough, the Omega breast is shaped like the Greek letter omega when viewed from the top down. The Omega shape is smaller at the base (or root) of the breast it supports. The normal thoracic shaping is the dotted line, and the omega shape is the solid line.
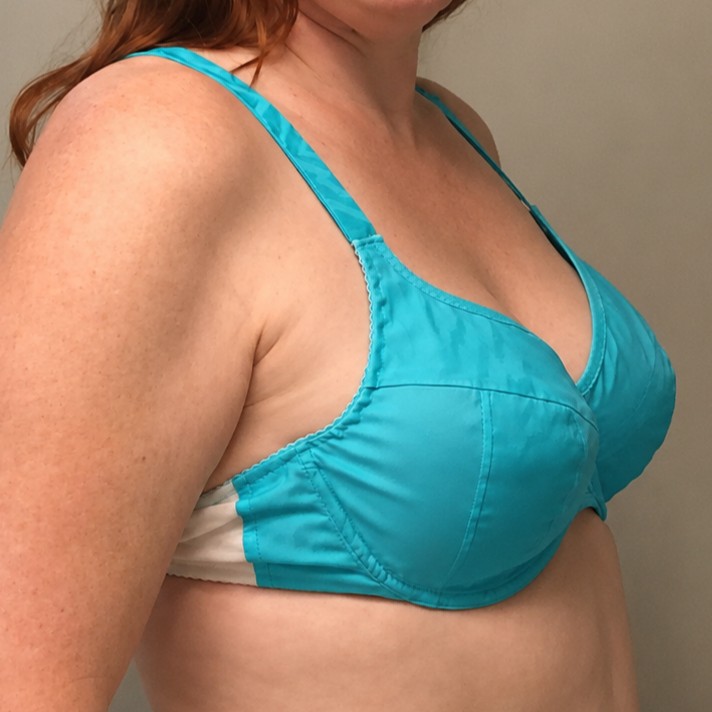
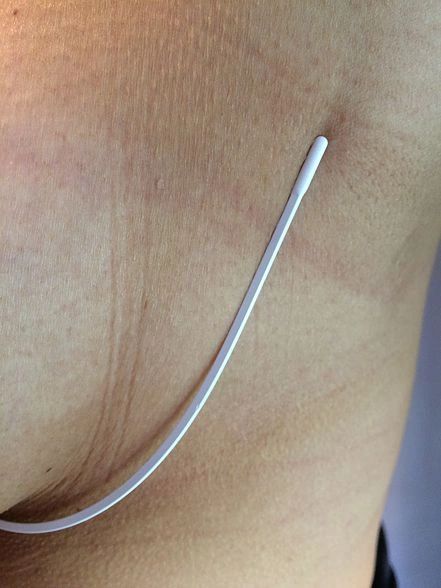
If you look at the breast from the side, the wire in the bra will pull back into the underarm area due to the tension on the band. In this photo (courtesy of Mrs. Weaver’sFinest blog,) you can see where the actual wire should sit, indicated by the small creases on the model’s body. However, the wire that is considered “standard” for her bra size, sits a long way back of the actual wire line crease.
The Omega shape is most pronounced on a proportionately small frame with large cup sizes. It can occur in someone who has lost a lot of weight in that area. It may happen to someone…Dare I say…older, who has lost a lot of muscle tone in the breast area. Some Omegas are flaccid, but others are dense and firm. It is a shape most challenging to fit. The good news is that the Alpha shape (the Classic proportioned breast shape) cup can be changed to an Omega-shaped cup.
If you are two or three wire sizes smaller than what the pattern calls for, you need to use a smaller frame to fit the smaller wire. Let’s say your pattern is a 6.25 BCD. In my patterns, a 6.25 uses a size 50 wire. But if you are a 44 wire, that’s 3 wire sizes smaller. If you use the frame that is 3 sizes smaller without changing the cup, the cup wire line will be much too long for the frame. The solution is to use the frame to fit the underwire size and then reduce the perimeter of the cup at the wire line to fit into the smaller frame. Choose a frame in your band size that is designed and sized for a 44 wire. Refer to the back of the pattern, and you will see that a 5.0 BCD uses a 44-wire. You will use the frame from the 5.0 size and the cups from the 6.25 size.
Now, if you are an experienced bra-maker, you will soon realize that a 38H cup will not fit a 38E frame. Why? Because the seam line that connects the cup to the frame will be too long. How much too short? If the difference is 3 wire sizes, multiply 5/8″ (15 mm) by 3. As you may know, the difference between wire sizes is 5/8″ per size. So three sizes are 15/8″ or 1 7/8″, or 1.875″ (4.5 cm).
Once you find out how much extra you have on the front and the side. Now you need to shrink the length of the cup’s wire line only. However, the shrinkage needs to occur below the apex. More specifically, if we imagine the breast is like a clock, the “shrinkage zone” will be from about 3:00 to 9:00. You can shrink the perimeter of the cup in several ways.
Gathers are best when you have one or two wire sizes to shrink or when there is no seaming within the shrinkage zone. Run a gathering line around the wire line, and pull the threads up gently so that the frame and cup wire lines match in length. The larger cup will now sew into the smaller frame. Strive to sew it so there are no puckers. This is very similar to easing in a sleeve cap. Steam the seamline afterward, and the gathers will almost disappear.
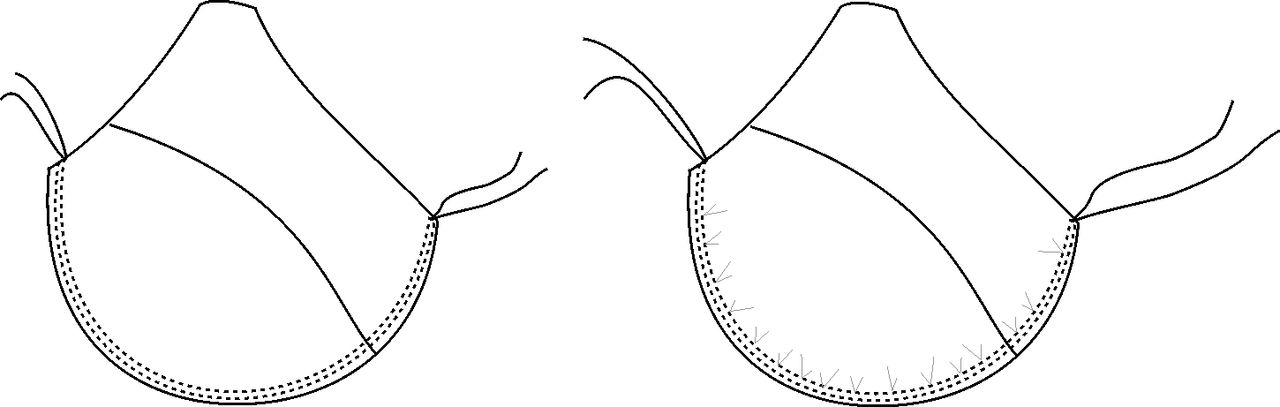
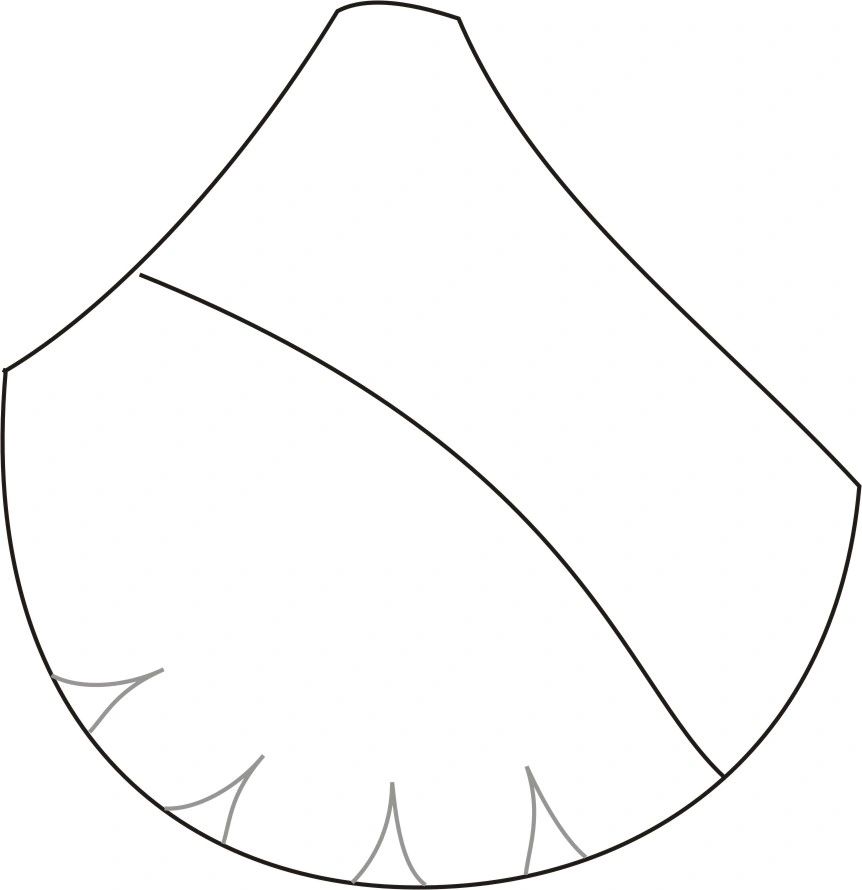
Small darts are best for the Omega shape if you have one to three sizes to shrink. You can draw and sew a series of small darts in the shrinkage zone. Keep the dart’s total length about 1–1.5″. If you sew the darts with legs curved inward rather than the straight legs of most garment darts, you will find they virtually disappear into the fabric.
CLEVER SEAMING
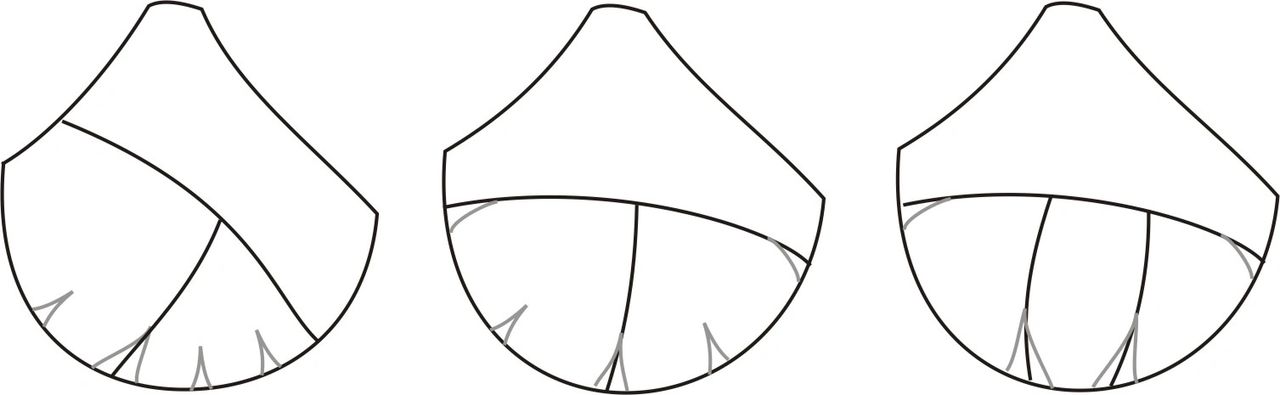
The best way to shrink the wire line 2 or more wire sizes is to hide the shrinkage in the seamlines. This means you need seamlines to work with within the shrinkage zone. You should always consider, at the very least, a horizontally seamed bra, with a split lower cup for an Omega; better still would be multiple-piece lower cups, such as the Jewel series of patterns (Ruby, Sapphire, Amethyst, and Diamond). The more seams there are, the more shaping can be added. You can also combine small darts with seaming.
Hopefully, the Omega in your life will be much happier with her altered bra.