
You might ask why someone would want to lower the strap tab on any bra, let alone tackle the tricky task of doing that alteration on a multi-piece cup. If the distance between your shoulder and the apex of your breasts is shorter than usual, you may find that the top of some bra cups lands too high on the chest wall above the breast. But there is another good reason to lower the strap tab, and that is that doing so will cause the breast to be lifted. When you have a longer distance between the apex and the shoulder points on a bra pattern, it is more difficult for the fabric to lift weight along that longer span than a shorter one. On the Pin-up Girls patterns, the patterns most likely to need this alteration are Ingrid, Shelley, and Judy (the sister pattern to Shelley).
I will demo this on The Ingrid, but I assure you, the others are exactly the same method, but it will be easier on Shelley and Judy. The Ingrid has that third piece to contend with, whereas Shelley and Judy do not. The first thing is to decide how much to lower the strap. For most women, that distance will be from 3/8″ (10 mm) to 3/4″ (20 mm), with the average being 1/2″ (12 mm)
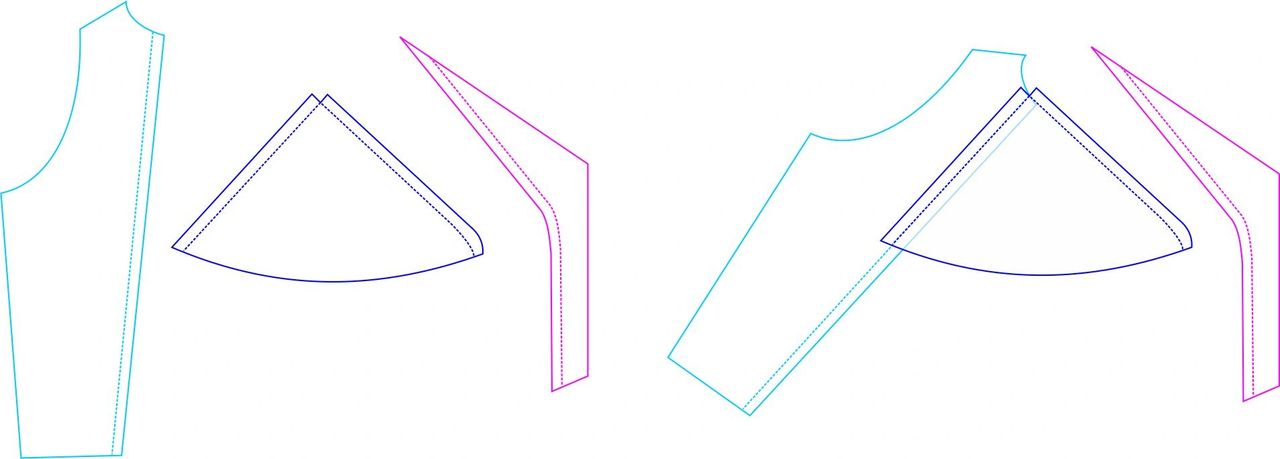
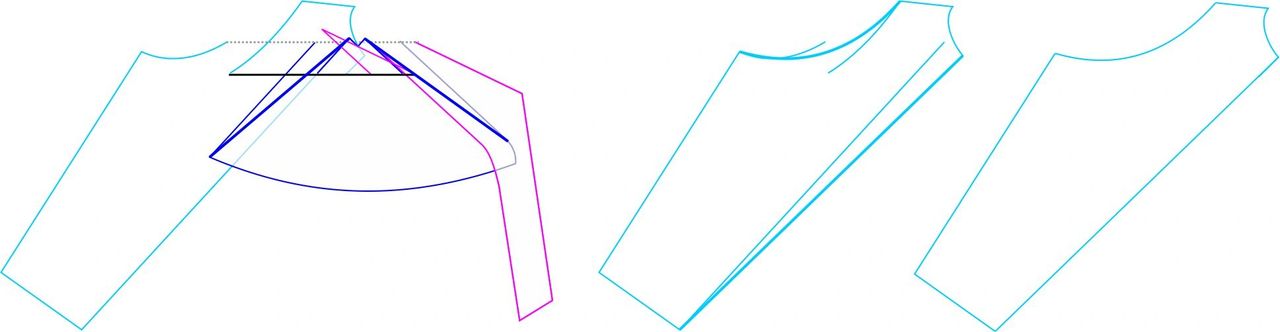
Drawing at left below: First, trace off the upper cup (blue), the side panel (turquoise), and the front panel (pink) of the pattern with the seam allowances drawn in lightly. I find it very helpful to trace the pattern pieces using a different colour for each piece. I show the pattern piece outline as a solid line and the seam line as a dotted line. My dotted lines are quite visible, but I want yours drawn in lightly so they can be erased later.
Drawing right below: Tape the three pieces together as if they were sewn. Use the invisible “magic tape” if you have it. I find the shiny tape does not remove from paper easily, but the magic tape is much more cooperative. Don’t make the mistake of overlapping the pieces 1/4″ (6 mm), which is the width of the seam allowance. These pieces are actually overlapped 1/2″ (12 mm), so the seam lines are aligned. The pieces will look a bit odd at the cut-out section of the upper cup.
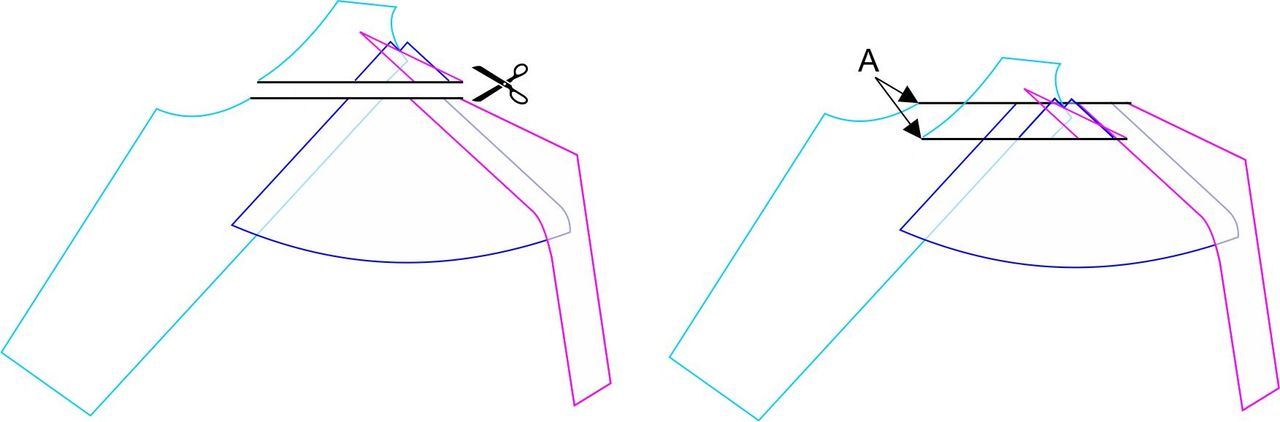
You can see how confusing all these lines get if they are visible, as in the left drawing below. Once the pieces are together, we can erase the seam lines shown at centre below. That’s the reason you drew them in lightly. Another alternative would be to cut the seam allowances off altogether and add them back when the alteration is complete. Fun fact: when I am teaching a class, I work with the seam allowances left on, but you can work without the seam allowances, too. Just be sure to put them back on when the draft is finished! Drawing at right below: Draw a line parallel with the DoGS line of the upper cup. Stay in the armhole curve of the strap tab, but be sure to include the front panel. The sweet spot is roughly 1-2″ (2.5-5 cm) down from the top of the strap tab.

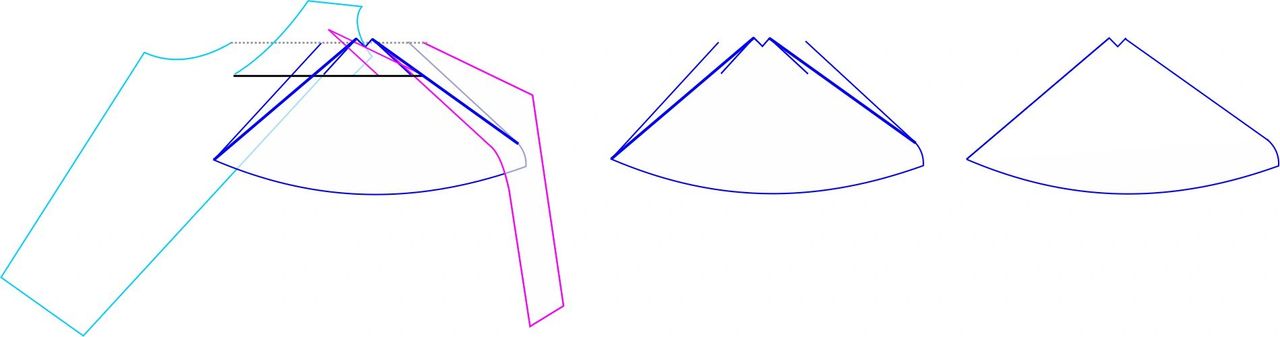
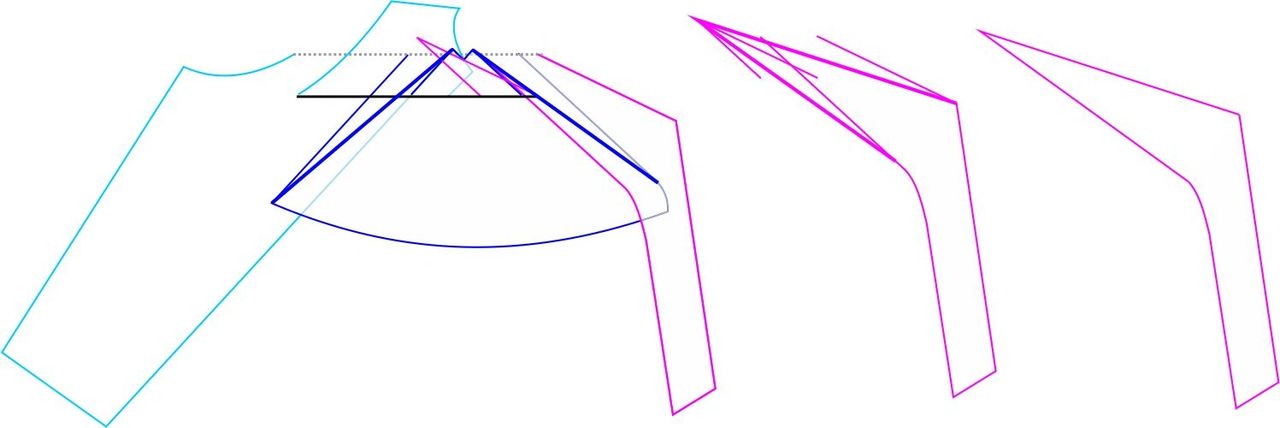
Now cut the taped pieces apart along the line, keeping them together exactly as they are. Slide the whole top section down the desired amount, let’s say 1/2″ (12 mm). Oh my, it does look like a mess. Aren’t you glad you did each piece in a different colour?
Let’s do each piece separately
Now to reconnect the pieces. I connect lines from what I call “known point” to “known point.” That means connect the points on either side of the sliced line (points that haven’t been altered). You will find that you are going to cut off some of the original pattern on one side of the line, but you will be adding to the other side of the line. That’s exactly what we want. First, start with the upper cup (blue). The bold lines are the new lines I am drawing. Join from the L-shaped cut-out down to where the curve starts along the front. Then join from the other side of the L-shaped cut-out to the bottom of the upper cup. Trace the new upper cup piece off.
Now to reconnect the pieces. I connect lines from what I call “known point” to “known point.” That means connect the Next, the power bar, or the side panel. The seam that connects to the upper cup is easy because that seam is a straight line. However, the armhole curve can be a little tricky. Use a French curve to draw a nice, neat curve between the shoulder point and the curve at the bottom.
If you were moving the strap on Shelley or Judy, your work is done. On Ingrid, however, you still have the front panel to do. Join from the point at the top to the centre front seam. Join from the same point to the start of the curved area of the front panel.
Here are the new pattern pieces compared to the original. The new modified piece is the bold line. You can see how the top of the pattern piece has shifted 1/2″ (12 mm) downward, while the bottom of the piece did not move.

If you have to lower the strap on a multi-piece cup, I hope you will remember this technique!